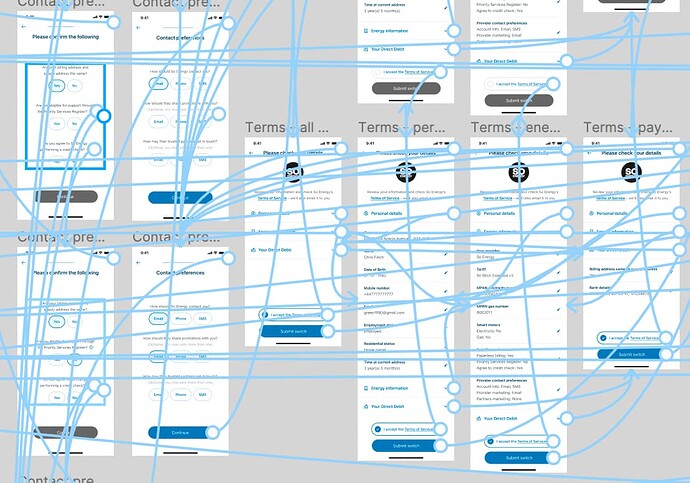
10 Time-Saving Tips and Tricks for Figma Users
9jatechbros
- 0
- 171
Introduction
Figma has revolutionized the design world with its powerful features and real-time collaboration capabilities. Whether you’re a seasoned designer or just starting out, mastering Figma can significantly boost your productivity. To help you make the most of this incredible tool, here are ten time-saving tips and tricks that will streamline your workflow and enhance your design efficiency.
Utilize Figma’s Keyboard Shortcuts
One of the most effective ways to speed up your workflow in Figma is to get comfortable with keyboard shortcuts. These shortcuts can save you precious time by allowing you to perform common tasks without constantly reaching for your mouse.
– Cmd/Ctrl + D: Duplicate selected object
– Alt/Option + Drag: Duplicate object while dragging
– Cmd/Ctrl + G: Group selected objects
– Cmd/Ctrl + Shift + G: Ungroup objects
– Cmd/Ctrl + R: Show/hide rulers
– Cmd/Ctrl + L: Lock/unlock objects
– Cmd/Ctrl + /: Quick actions and search
By memorizing these shortcuts, you can navigate through Figma more fluidly and focus more on your design work rather than on the mechanics of the software.
Master Auto Layout for Responsive Design
Auto Layout is a powerful feature in Figma that enables you to create designs that automatically adjust based on content changes. This is particularly useful for responsive design, where elements need to adapt to different screen sizes and content variations.
To use Auto Layout, select the elements you want to include, right-click, and choose “Add Auto Layout” or press Shift + A. You can then configure how elements should resize and reposition themselves within the parent frame. This includes setting padding, spacing, and alignment options.
With Auto Layout, you can design components like buttons, cards, and forms that dynamically adjust their size and layout, saving you time on manual adjustments.
Leverage Components and Variants
Components are reusable design elements that ensure consistency across your project. When you create a component, you can use instances of it throughout your design. Any changes made to the master component will automatically update all instances, saving you the hassle of making repetitive edits.
To create a component, select an element or group of elements, right-click, and choose “Create Component” or press Cmd/Ctrl + Alt + K. You can then drag instances of this component from the Assets panel.
Variants are an extension of components that allow you to create multiple states or versions of a component. For example, you can create a button component with different variants for default, hover, and active states. To add variants, select a component, go to the Properties panel, and click “Add Variant.”
Using components and variants not only saves time but also maintains design consistency across your project.
Use Constraints for Responsive Resizing
Constraints in Figma allow you to define how objects should resize relative to their parent frame. This is especially useful for responsive design, where elements need to adapt to different screen sizes.
To set constraints, select an object and look for the Constraints section in the Properties panel. You can choose to fix the position of an object relative to the left, right, top, bottom, or center of its parent frame. Additionally, you can set objects to stretch horizontally or vertically.
By setting constraints, you ensure that your design elements resize appropriately when their parent frame changes size, reducing the need for manual adjustments.
Take Advantage of Figma Plugins
Figma’s plugin ecosystem offers a wide range of tools that can enhance your workflow. Plugins can automate repetitive tasks, generate design assets, and integrate with other tools you use.
To browse and install plugins, click on the Resources button in the top-right corner and select “Plugins.” Some popular plugins include:
– Content Reel: Quickly insert placeholder text, images, and icons into your design.
– Unsplash: Access a vast library of free stock photos directly within Figma.
– Stark: Check your designs for accessibility issues and color contrast.
– Autoflow: Create user flows and diagrams with ease.
By incorporating plugins into your workflow, you can save time on manual tasks and focus more on the creative aspects of your design work.
Use Grids and Layouts for Precision
Grids and layouts are essential tools for creating balanced and organized designs. Figma allows you to set up both grids and layout grids to help you align elements precisely.
To add a grid or layout grid, select a frame, go to the Properties panel, and click on the “+” icon next to “Layout Grid.” You can choose between a square grid or a column/row layout grid. Customize the size, color, and opacity of your grid to suit your needs.
Using grids and layouts ensures that your designs are consistent and aligned, reducing the time spent on manual adjustments and alignment checks.
Collaborate in Real-Time
One of Figma’s standout features is its real-time collaboration capabilities. Multiple team members can work on the same file simultaneously, making it easy to share feedback and make updates on the fly.
To collaborate in real-time, simply share a link to your Figma file with your team members. They can view, comment, and edit the design in real-time. Use comments to provide feedback and ask questions without disrupting the design process.
Real-time collaboration not only speeds up the design process but also fosters better communication and teamwork, resulting in higher-quality designs.
Organize Your Design Files
Keeping your design files organized is crucial for maintaining efficiency and ensuring that you can quickly find and update elements as needed. Here are some tips for organizing your Figma files:
– Use Pages: Separate different sections or versions of your project into pages. For example, you can have separate pages for wireframes, high-fidelity designs, and prototypes.
– Name Layers and Frames: Give meaningful names to your layers and frames to easily identify them later.
– Group and Nest Layers: Group related elements together and nest layers within frames to keep your layers panel tidy.
– Use Color Codes: Apply color labels to layers or frames to quickly differentiate between different types of elements.
An organized design file not only makes your work more efficient but also makes it easier for collaborators to navigate and understand your designs.
Prototype with Interactive Components
Prototyping in Figma allows you to create interactive mockups of your designs, making it easier to visualize and test user interactions. Interactive components take this a step further by allowing you to add interactivity directly within components.
To create an interactive component, first create a component with multiple variants. Then, switch to the Prototype tab in the Properties panel and define interactions between the variants. For example, you can create a button with hover and click states, and define the interactions that trigger these states.
By using interactive components, you can build more realistic prototypes that simulate actual user interactions, providing valuable insights during the design and testing phases.
Utilize Design Systems
A design system is a collection of reusable components, styles, and guidelines that ensure consistency across a product or brand. Figma makes it easy to create and manage design systems, which can significantly speed up your workflow.
To create a design system, start by creating a dedicated file for your components, colors, and text styles. Organize these assets into sections and give them clear, descriptive names. Then, share this file with your team and use it as a library in your other design files.
By using a design system, you can quickly access and apply consistent design elements across your projects, reducing the time spent on recreating components and styles.
Explore Advanced Features
As you become more comfortable with Figma, take the time to explore some of its advanced features that can further enhance your workflow:
– Smart Selection: Use Smart Selection to quickly align and distribute multiple objects. Select the objects, then use the handles that appear to adjust the spacing and alignment.
– Vector Networks: Figma’s vector editing capabilities allow for more complex and flexible vector shapes. Use vector networks to create intricate designs without the limitations of traditional path-based vector tools.
– Export Options: Figma offers powerful export options that allow you to export assets in various formats and resolutions. Use the Export panel to customize your export settings and ensure your assets are optimized for their intended use.
By mastering these advanced features, you can take your design skills to the next level and work even more efficiently in Figma.
Conclusion
Figma is a versatile and powerful tool that offers a wide range of features to enhance your design workflow. By utilizing keyboard shortcuts, mastering Auto Layout and components, leveraging plugins, and organizing your design files, you can significantly speed up your workflow and create high-quality designs more efficiently. Additionally, taking advantage of Figma’s real-time collaboration, prototyping capabilities, and design system support will further streamline your process and improve team collaboration.
Remember, the key to becoming proficient in Figma is practice and exploration. Don’t be afraid to experiment with new features and techniques, and continuously seek out resources and tutorials to expand your knowledge. With these time-saving tips and tricks, you’ll be well on your way to becoming a Figma expert and creating stunning interface designs with ease.


