Getting Started with Adobe Photoshop: A Beginner’s Guide
9jatechbros
- 3
- 89
If you’re new to Adobe Photoshop, you’re about to embark on a journey into one of the most powerful and versatile graphic design tools available. Whether you’re looking to edit photos, create digital artwork, or design graphics, Photoshop offers a vast array of features to help you bring your creative visions to life. In this beginner’s guide, we’ll cover an overview of the Photoshop interface, introduce you to basic tools and their functions, and provide tips for setting up your first project.
Overview of the Photoshop Interface
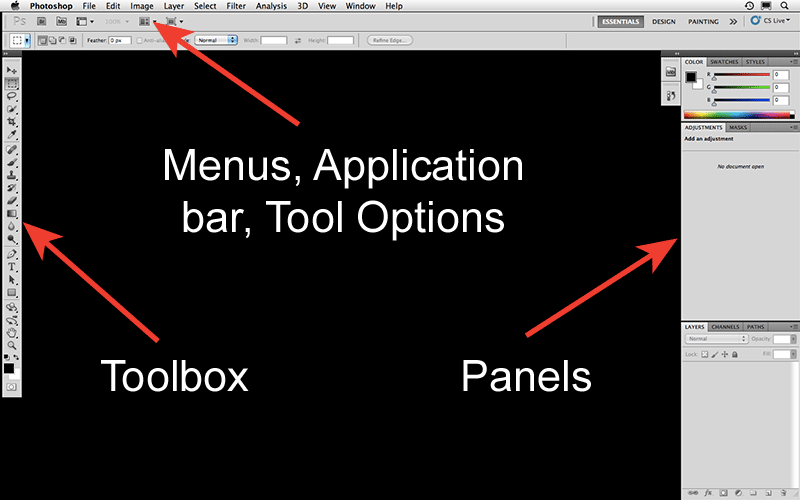
When you first open Photoshop, the interface might seem overwhelming. However, once you understand the layout, it becomes much easier to navigate. Here are the key components you’ll interact with:
1. Menu Bar: Located at the top of the screen, the menu bar includes various options like File, Edit, Image, Layer, Type, Select, Filter, View, Window, and Help. These menus contain all the commands and functions you’ll use in Photoshop.
2. Toolbar: Situated on the left side, the toolbar houses the primary tools you’ll use for editing and creating images. Each tool has a specific function, from selecting parts of an image to painting and erasing.
3. Options Bar: Directly below the menu bar, the options bar changes depending on the tool you’ve selected. It provides settings and options for the currently active tool.
4. Panels: On the right side of the interface, you’ll find panels like Layers, Properties, Adjustments, and more. Panels help you manage different aspects of your project, such as layers, color, and history.
5. Canvas: The central area where your image or project is displayed. This is where you’ll do most of your work, whether it’s editing a photo or creating a new design.
6. Status Bar: Located at the bottom of the interface, the status bar provides information about your project, such as zoom level and color profile.

Basic Tools and Their Functions
Now that you’re familiar with the interface, let’s dive into some of the basic tools in Photoshop. These tools are essential for any beginner to master:
1. Move Tool (V): Used to move selected areas, layers, and guides.
2. Marquee Tools (M): Includes Rectangular Marquee and Elliptical Marquee tools for making rectangular and elliptical selections.
3. Lasso Tools (L): Includes the Lasso, Polygonal Lasso, and Magnetic Lasso tools for freehand, polygonal, and magnetic edge selections.
4. Quick Selection Tool (W) and Magic Wand Tool (W): These tools allow you to quickly select areas based on color and tone.
5. Crop Tool (C): Used to trim and straighten images.
6. Eyedropper Tool (I): Allows you to sample colors from your image.
7. Brush Tool (B): Used for painting on your image. You can adjust brush size, hardness, and opacity.
8. Eraser Tool (E): Erases pixels from your image.
9. Gradient Tool (G) and Paint Bucket Tool (G): Used to create gradients and fill areas with color.
10. Clone Stamp Tool (S): Allows you to duplicate parts of an image.
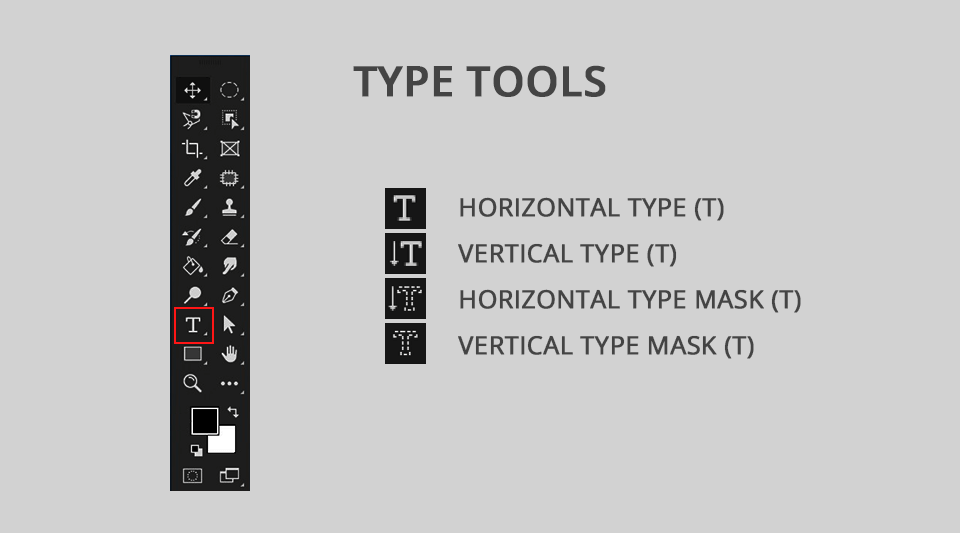
11. Text Tool (T): Used to add text to your image. You can customize the font, size, color, and style.
12. Hand Tool (H) and Zoom Tool (Z): Used to navigate around your image and zoom in and out.

Tips for Setting Up Your First Project
Starting a new project in Photoshop is exciting, but it can also be daunting. Here are some tips to help you get started:
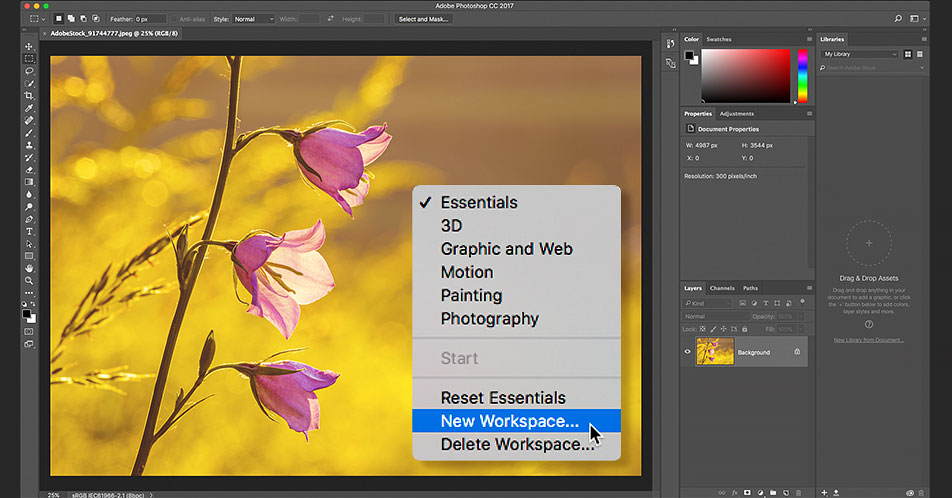
1. Set Up Your Workspace: Customize your workspace to suit your needs. Go to Window > Workspace and choose a workspace that matches your workflow, such as Essentials, Photography, or Graphic and Web. You can also create a custom workspace by arranging the panels and saving the layout.
2. Create a New Document: Go to File > New or press Ctrl+N (Cmd+N on Mac) to create a new document. Set the dimensions, resolution, and color mode based on your project requirements. For web graphics, 72 pixels/inch is standard, while for print, 300 pixels/inch is recommended.
3. Organize Layers: Layers are essential for non-destructive editing. Use the Layers panel to create and organize your layers. Name your layers descriptively to keep track of them easily. Group related layers into folders by selecting them and pressing Ctrl+G (Cmd+G on Mac).
4. Use Adjustment Layers: Adjustment layers allow you to apply color and tonal adjustments non-destructively. Go to Layer > New Adjustment Layer and choose from options like Brightness/Contrast, Levels, Curves, and Hue/Saturation.
5. Learn Keyboard Shortcuts: Keyboard shortcuts can significantly speed up your workflow. Familiarize yourself with common shortcuts, such as Ctrl+Z (Cmd+Z on Mac) for undo, Ctrl+C (Cmd+C on Mac) for copy, and Ctrl+V (Cmd+V on Mac) for paste. You can find a full list of shortcuts in the Help menu.
6. Save Your Work Regularly: Photoshop can be demanding on your computer, so it’s essential to save your work frequently. Use File > Save or Ctrl+S (Cmd+S on Mac) to save your project. Consider saving multiple versions of your work to easily revert to an earlier state if needed.
7. Experiment and Practice: The best way to learn Photoshop is through experimentation. Don’t be afraid to try different tools and techniques. Follow online tutorials and recreate effects to build your skills.
8. Utilize Photoshop’s Help Resources: If you get stuck, Photoshop’s Help menu is a valuable resource. Access tutorials, forums, and guides directly from the application.

Conclusion
Congratulations on taking your first steps into the world of Adobe Photoshop! By familiarizing yourself with the interface, understanding basic tools, and following these tips for setting up your first project, you’ll be well on your way to creating stunning graphics and edits. Remember, mastery comes with practice, so keep exploring and experimenting with the vast array of features Photoshop has to offer. Stay tuned to 9jaTechBros for more tutorials and tips to help you on your creative journey. Happy Photoshopping!


I don’t think the title of your article matches the content lol. Just kidding, mainly because I had some doubts after reading the article.
Your point of view caught my eye and was very interesting. Thanks. I have a question for you.
Your article helped me a lot, is there any more related content? Thanks!