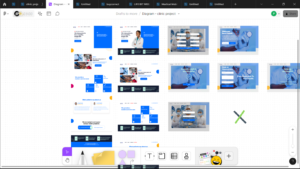
Beginner’s Guide to Figma: How to Get Started with Interface Design
9jatechbros
- 1
- 169
Diving into the world of interface design can be a daunting task, especially if you’re new to the field. However, with tools like Figma, the process becomes much more approachable and enjoyable. Figma is a powerful, browser-based design tool that has rapidly gained popularity among designers due to its user-friendly interface and robust collaborative features. Whether you’re a complete beginner or transitioning from another design tool, this guide will help you get started with Figma and set you on the path to creating stunning interface designs.
First things first, you need to set up an account on Figma. Visit Figma’s website and sign up for a free account. Figma’s free plan is quite generous and provides ample features for beginners to get started. Once you’re signed up, you’ll be greeted by the Figma dashboard. This is your control center, where you can manage all your design projects. The dashboard is clean and intuitive, making it easy to navigate even for those who are new to design software.
Before you start designing, it’s important to understand the basic layout of Figma’s interface. On the left side of the screen, you’ll find the Layers Panel, which displays all the elements in your design in a hierarchical order. This is where you can organize and manage the different components of your project. On the right side is the Properties Panel, which allows you to adjust the properties of any selected element, such as its size, color, and position. At the top, you have the Toolbar, which contains various tools for creating and editing your designs.
To begin a new project, click on the “+ New File” button on the dashboard. This will open a blank canvas where you can start designing. Figma operates on a frame-based system, which means you need to create frames to contain your design elements. Think of frames as the building blocks of your design. To create a frame, select the Frame Tool from the Toolbar or press the “F” key on your keyboard. Click and drag on the canvas to draw a frame. You can resize and position frames as needed using the Properties Panel.
With your frame in place, it’s time to start adding elements to your design. Figma offers a variety of basic shapes, such as rectangles, circles, and lines, which you can access from the Shape Tool in the Toolbar. Select the desired shape and click and drag on the canvas to draw it. You can adjust the properties of the shape, such as its fill color, stroke color, and size, using the Properties Panel. Additionally, you can add text to your design by selecting the Text Tool from the Toolbar or pressing the “T” key. Click on the canvas and start typing to add text. Like shapes, text properties can be customized in the Properties Panel.
One of the standout features of Figma is its ability to create reusable components. Components are design elements that can be reused across multiple frames and projects, making it easy to maintain consistency in your designs. To create a component, select the element you want to convert into a component and right-click on it. Choose “Create Component” from the context menu. The element will now be saved as a component, and you can drag instances of it from the Assets Panel, located on the left side of the screen. Any changes made to the master component will automatically update all instances of that component, saving you time and effort.

Figma’s collaborative features are another reason it has become a favorite among designers. Since Figma is browser-based, you can easily share your designs with others by simply sharing a link. Collaborators can view, comment on, and even edit the design in real-time, making it perfect for team projects. To share your design, click on the “Share” button in the top-right corner of the screen and copy the link provided. You can also invite specific people by entering their email addresses.
Prototyping is an essential part of the design process, and Figma excels in this area as well. Prototypes allow you to create interactive mockups of your designs, making it easier to visualize how the final product will function. To create a prototype in Figma, switch to the Prototype tab in the Properties Panel. From here, you can link different frames and elements together by drawing connections between them. You can also define interactions, such as on-click or on-hover, and set transition animations to create a more realistic experience. Once your prototype is complete, you can share it with others using the same sharing functionality mentioned earlier.
Figma also supports a wide range of plugins that can enhance your design workflow. Plugins are third-party tools that integrate with Figma and provide additional functionality, such as advanced animations, design systems, and accessibility checks. To browse and install plugins, click on the “Resources” button in the top-right corner of the screen and select “Plugins.” From here, you can search for plugins, read reviews, and install the ones that suit your needs. Once installed, plugins can be accessed from the main menu under “Plugins.”
As you start to get more comfortable with Figma, you’ll want to explore some of the more advanced features it offers. For example, Figma’s Auto Layout feature allows you to create responsive designs that automatically adjust to different screen sizes. To use Auto Layout, select the elements you want to include and click on the “Auto Layout” button in the Properties Panel. You can then define how the elements should resize and reposition themselves based on the parent frame. This is particularly useful for designing user interfaces that need to work across a variety of devices.
Another advanced feature to explore is Figma’s ability to work with design systems. A design system is a collection of reusable components, styles, and guidelines that ensure consistency across a product or brand. Figma makes it easy to create and manage design systems by allowing you to save components, colors, and text styles as assets that can be reused across multiple projects. To create a design system, simply organize your components and styles into a dedicated file and share it with your team. They can then access and use these assets in their own projects, ensuring a consistent look and feel.
As you continue to use Figma, you’ll discover a wealth of resources available to help you improve your skills and stay up-to-date with the latest design trends. Figma’s community is incredibly active, and there are numerous tutorials, webinars, and forums where you can learn from other designers and share your own knowledge. The Figma blog is also a great source of inspiration and tips, covering a wide range of topics from design principles to advanced techniques.
In conclusion, Figma is an incredibly powerful and versatile tool for interface design, and it’s accessible enough for beginners to pick up quickly. By familiarizing yourself with the basic layout and features, creating frames and components, and exploring the collaborative and prototyping capabilities, you’ll be well on your way to becoming a proficient Figma user. Don’t be afraid to experiment and try out new techniques, and remember that the key to mastering any tool is practice and persistence. Happy designing!


Your article helped me a lot, is there any more related content? Thanks!